These days, they say anyone and their grandma can create and
launch a website. But having been through it a handful of times,
I can say truthfully it's still kind of a mess. Perhaps it's
even intentional—companies like SquareSpace and Wix thrive
precisely because it's still so difficult! Even the best
tutorials are generally scattered, don't explain the meaning
behind each step, and often just unhelpfully link you to generic
documentation. This post attempts to teach you to launch your
own website in a maintainable and explainable way.
You'll need some familiarity with command line tools. To be
clear, this post is not about creating content for your website
(HTML/CSS/JS). Instead, this tutorial will lead you through
deploying your website once it's ready by launching a fresh AWS
machine, setting up an NGINX web server, setting up a domain on
Google Domains, and adding HTTPS using Certbot. If that sounds
like what you've been searching for, read on!
Part 1: Launching the Web Server
In the old days of Web 1.0, people used to run web servers from
their own computers sitting inside their homes. These days, it's
common practice to rent cloud compute on a virtual machine owned
and maintained by a provider, such as Amazon Web Services (AWS),
Google Cloud Platform (GCP), or Microsoft Azure. There aren't
many differences between them, but just know that each cloud
provider intentionally tries to lock you into their ecosystem,
making it hard to change providers later. We'll use AWS for the
purposes of this tutorial, sticking with the options that fall
under AWS's Free Tier so we can run our website
for free for the first year.
From the Services menu, navigate to EC2. EC2 stands for Elastic
Compute Cloud and is where we will launch a virtual machine
which will become our web server.
Click the orange Launch
Instances button.
We're asked to choose an operating system. For the purposes
of this tutorial, we'll choose Ubuntu Server 20.04. We'll
leave the option on the right toggled to 64-bit (x86). Click Select.
Next, we're asked to choose how powerful of a machine we
want. For this tutorial, we'll choose the t2.micro since it's eligible
for the free tier. Click Next: Configure Instance
Details.
Nothing to do here! Click Next: Add Storage.
Our machine currently has 8 GB of storage. You can choose up
to 30 GB if you like for free. Click Next: Add Tags.
Nothing to do here! Click Next: Configure Security
Group.
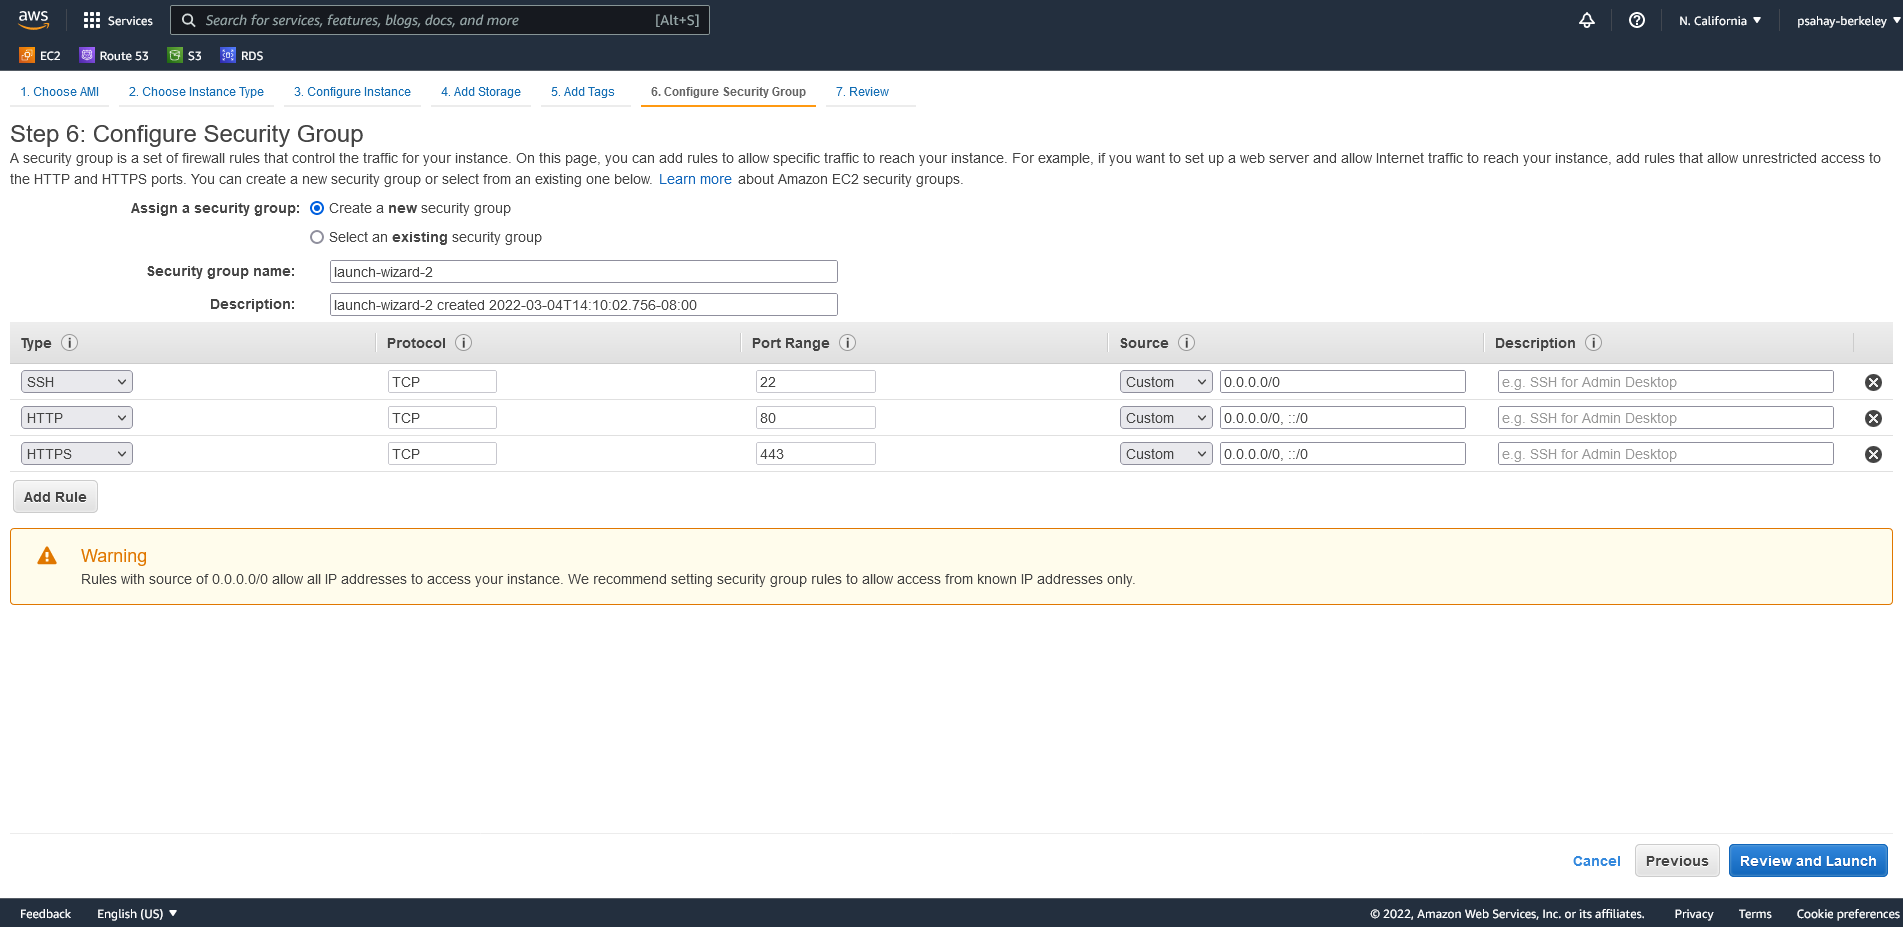
In its current security configuration, this machine will
only allow SSH connections and nothing else. However, web
servers need to accept HTTP and HTTPS connections, so let's
add those. Click Add
Rule and choose HTTP under Type. Click Add Rule again and choose
HTTPS under Type.
Your security group configuration should now look like this.
Your security group configuration should now look like this.
Click Review and
Launch then Launch.
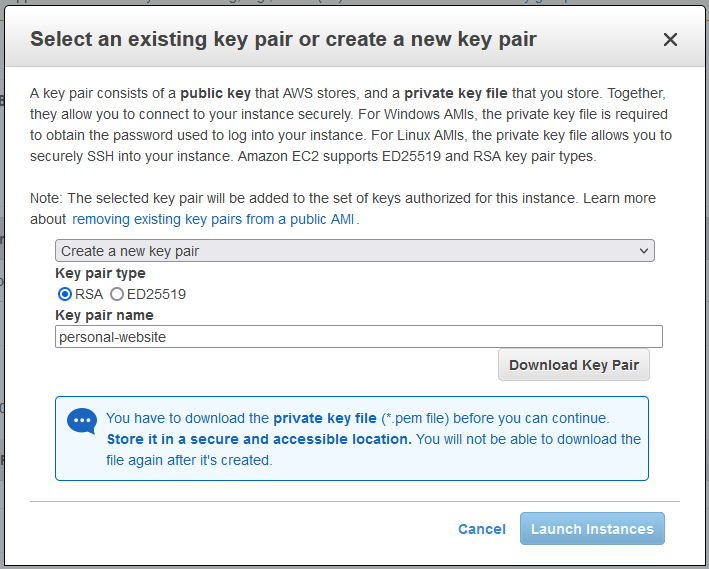
A pop-up appears asking to select an existing key pair or
create a new key pair. Choose Create a new key pair. Set
the type to RSA. Give
it any name, e.g. personal-website, and click
Download Key Pair. You
can save the resulting .pem file anywhere, but I'd recommend
keeping it in ~/.ssh/. This file is called an
Identity File and is necessary to SSH into your AWS machine.
You'll have to modify the permissions on this file before
you can use it with SSH. Run the following command in your
terminal:
chmod 400 <path/to/your/identity/file.pem>
Download your Identity File from this pop-up.
Download your Identity File from this pop-up.
Click Launch
Instances.
Give AWS a few minutes to spin up your new machine. Once
it's launched, you'll be able to see it on the EC2
dashboard. From the dashboard, click on Instances and click on the
Instance ID of your
new machine. This will show information about your new
instance, including its Public IPv4 address which
you should note down.
Almost there! Now, let's SSH into our new machine and
install a web server. Apache and NGINX are popular free
ones—there isn't much difference so we'll use NGINX
for this tutorial. You'll need the IPv4 address of your
machine and the .pem file you downloaded earlier. Run the
following command from your terminal:
Note: If you'll be SSH-ing into your machine a lot, you can
set up a convenient nickname inside
~/.ssh/config so you don't have to type the
path to the .pem file and IPv4 information every time.
We're now inside our brand new machine. It's good practice
to always run sudo apt update and sudo
apt -y upgrade in any new Ubuntu machine. This will
download updates and may take a couple minutes.
Once that's done, let's install NGINX with sudo apt
install nginx. Once it's installed, let's launch it
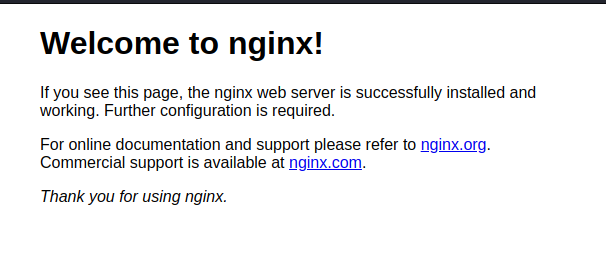
with sudo nginx -s reload. At this point, you
should be able to navigate to your server's IPv4 address in
your browser and see the NGINX welcome page!
Your server is up and running if you can see this in your browser.
Your server is up and running if you can see this in your browser.
At the moment, NGINX is serving a static HTML page located
on your server at
/var/www/html/index.nginx-debian.html. You can
edit this file—go ahead and try—but it's a bit
cumbersome because you'll need superuser privileges every
time. Let's point NGINX to a new folder in our home
directory called html instead. Run:
cd ~
mkdir html
chmod 755 html/
cp /var/www/html/index.nginx-debian.html html/
Now, let's point NGINX to our new folder. Edit the file at
/etc/nginx/sites-enabled/default using your
favorite editor with sudo privileges. This is the
configuration file for our web server. Find the line that
says root /var/www/html and modify it to point
to our new folder. It should now say:
...
root /home/ubuntu/html;
...
You can now edit your
~/html/index.nginx-debian.html file as you
please! It's common practice to shorten this filename to
index.html
for convenience if you'd like. Don't worry, it won't break
anything.
Part 2: Pointing a Domain at the Web Server
Hooray! Now our web server is running, but our visitors would
have to type our IP address into their browser to visit it,
which isn't a great experience. Instead, we'd like to point a
custom domain to our server. This part is much easier—just
have your IPv4 address handy from earlier. Typical websites for
purchasing domains include GoDaddy, BlueHost, and Google
Domains. For reference, AWS also has their own domain management
system called Route 53, but it's confusing and difficult to use.
Let's use Google Domains for this tutorial.
Click Get a new domain
and purchase something you like. Take your time, I'll be
here.
Navigate to My domains
and click on your new domain.
From the left menu, choose DNS.
Under Custom records,
let's add two new records—one for
example.com and one for
www.example.com.
For the first one, leave
Host name
empty. Under Type, select A because we're
creating what's called an A-name record. Leave TTL as
3600—that's just a "time to live" parameter we
don't need to worry about. Finally, under Data
enter your server's IPv4 address.
Create one more that's identical to the previous one
but whose Host
name is www.
Hit Save.
That's it! Give it a few minutes, then try navigating to
your domain from your browser. You should see your website!
If you're having trouble, I'd recommend looking into the
dig command line tool to debug.
Part 3: Adding HTTPS (Optional)
You may have noticed your browser complaining that your website
is insecure. This is because modern websites use HTTPS for
encrypting traffic, but our website is only configured for HTTP.
HTTPS is technically optional, but not really because these days
Google won't even surface your website in search results unless
it has HTTPS enabled.
There are many providers of HTTPS certificates. Let's use
Certbot
since it's easy and free. Note that Certbot will prompt you to
renew your certificate every 90 days.
SSH into your machine.
Run:
sudo apt install-y python3-certbot-nginx
Run Certbot:
sudo certbot --nginx
Certbot should lead you through a few steps:
Enter your email so Certbot can remind you to renew
your certificate every 90 days.
Then enter the domain name you purchased, e.g.
example.com.
Finally, allow Certbot to modify your NGINX
configuration. As a result, Certbot will edit
/etc/nginx/nginx.conf
to redirect anyone trying to connect to your website
insecurely over HTTP to connect over HTTPS instead.
You'll need to create a new NGINX configuration file for
your website. The name of the file is typically the same as
your domain name. Run the following:
cd /etc/nginx/sites-available/
sudo touch mywebsitename.com
Edit the file we just created called
mywebsitename.com using your favorite editor
(vim, nano, etc.) with sudo privileges. Add the following
content inside, replacing all six instances of
mywebsitename.com with your domain name:
server {
listen 80;
server_name mywebsitename.com www.mywebsitename.com;return 301 https://$host$request_uri;}
server {
listen 443 ssl;
server_name mywebsitename.com www.mywebsitename.com;
root /path/to/html;
index index.html;
ssl_certificate /etc/letsencrypt/live/mywebsitename.com/fullchain.pem;
ssl_certificate_key /etc/letsencrypt/live/mywebsitename.com/privkey.pem;}
We can put multiple configurations inside
/etc/nginx/sites-available, but NGINX will only
run the one(s) pointed to by the file inside
/etc/nginx/sites-enabled. We'll now create a
symbolic link, which is just a file that points to another
file, to point to our configuration. Run:
cd /etc/nginx/sites-enabled
sudo rm default
sudo ln-s /etc/nginx/sites-available/mywebsitename.com mywebsitename.com
Reload NGINX to apply the updated configuration with:
sudo nginx -s reload
Your website now has HTTPS! Navigate to your website in your
browser to check—you should see the "insecure
connection" icons/messages disappear. It may take a reload
or two.
Next Steps
Now that your website is launched, how should you actually build
your content? Well, that's beyond the scope of this tutorial,
but it depends on how simple or sophisticated of a website you
need.
If you're just putting up a single page with no forms, you can
write raw HTML/CSS/JS in your index.html file
without relying on any other tools.
If you want to put up multiple static pages (like a blog or
project portfolio), you can use a static website generator like
Jekyll (which is what this
website uses) or Hugo. These
tools save you from having to add your header and footer to
every page by hand, and have free themes you can use.
Lastly, if you're planning to run a complex app with forms and
user log in, you should build a web app using a tool like Django
or Flask,
which use Python. These require some additional
setup—perhaps to be covered in another blog post—but
will plug right into your current configuration.
For now though, congratulations netizen, you have your very own
website! Happy serving!