As a modern software engineer, you probably have a good working knowledge of the most common Git commands—committing, branching, and merging. But there's actually much more hidden depth to Git than you might expect. So much so, in fact, that it could change the way you work. For one thing, your commit history is much more fluid than you might assume—it isn't quite written in stone the way most beginner tutorials might lead you to believe.
This post is about understanding the fundamental ideas behind Git, unlocking some hidden features, and taking your version control to the next level. As such, it assumes you already have a decent grasp of committing, branching, and merging. It's also a helpful reference for me personally—there's a few super rarely-used but helpful commands here that I repeatedly forget the syntax for.
Global Gitignore
Let's start with something you may already know. You're probably
aware that if you create a file called
.gitignore in your Git project and add some ignore
rules, Git will automatically ignore any files that match those
rules. What you may not know is that you can create a global
ignore file which will apply globally across all projects. Try
creating one in your home directory that looks like this:
~/.gitignore
# Global gitignore

# Build files
*.bin

# Editor-specific files
.idea/
.vscode/
~/.gitignore
Note that you can name your file anything and keep it anywhere. Then, simply run:
git config --global core.excludesfile ~/.gitignoreand all files that match will be ignored in all situations. It's recommended to keep editor-specific ignore rules here; this prevents every team member from adding their own editor- and workspace-specific rules to every project.
Git Grep
In large projects, it's often very slow to use regular grep to
find a piece of text in a folder. Fortunately, Git ships with a
tool called git grep, which will skip untracked
files to speed up search. Run:
git grep "search term"Remotes
You might have also heard about the distributed nature of Git, but have you ever actually taken advantage of it? It's good to know how to handle remotes flexibly in case you ever run into the odd situation where you need it. For example, if your Git server goes down for a day or you're in a place without network access, you can continue collaborating with your teammate by adding their machine as a remote. This can also be useful, for example, if you're working with a contractor developing code for you who isn't allowed access to the corporate intranet.
If it's a new repository, rather than cloning from GitHub, you
can clone from a peer machine on the same network over SSH using:
git clone ssh:gituser@hostname:/path/to/project
Alternatively, the repository may already exist on your machine
and you want to add your colleague's machine as another remote.
In this case, use:
git remote add my_other_remote username@hostname[.domain.com]:path/to/project.gitgit remote
-vv—you should now see two remotes listed. Now you
can simply git pull my_other_remote master and
git push origin master whenever you need to pull
code from your colleague's machine and sync it with the origin.
Stashing
Git's stash is incredibly helpful. It's used to save uncommitted
changes to be applied later, even to a completely different
branch. For example, very often when you're trying to git
pull it will fail because you have a conflicting change
that's preventing Git from pulling. In this case, you can
git stash your changes, then
git pull, then run git stash pop or
git stash apply (pop is the same as apply but also
also deletes the stash unless there is a conflict). Now you can
properly deal with merge conflicts if there are any.
You can have multiple stashed changes. Run git stash
list to see them all and git stash show -p
stash@{#} to view the stash in diff form, replacing
# with the ID of the stash you want. git
stash drop stash@{#} is used to delete a stash. It's
very helpful when you have uncommitted changes preventing you
from performing a Git action, e.g. checking out another branch.
Use git stash clear to delete all stashes.
All of these commands can be run without a stash ID—the
action will simply apply to the topmost stash
(stash@{0}). To keep your stashes from getting out
of control, you should attach memorable messages when stashing.
Use
git stash save "My memorable message"Patches
Sometimes you need to move code around but can't or don't want to push it to a remote. Maybe it's test code that you want to send your colleague to debug, and you'd rather not push it, even as a WIP commit. In this case, you can write your changes into a patch, which is just a text file containing the diff. Simply run
git diff > mypatch.patchand your diff will be saved into the file. Send it to your colleague, and let them apply it to their copy of the project with
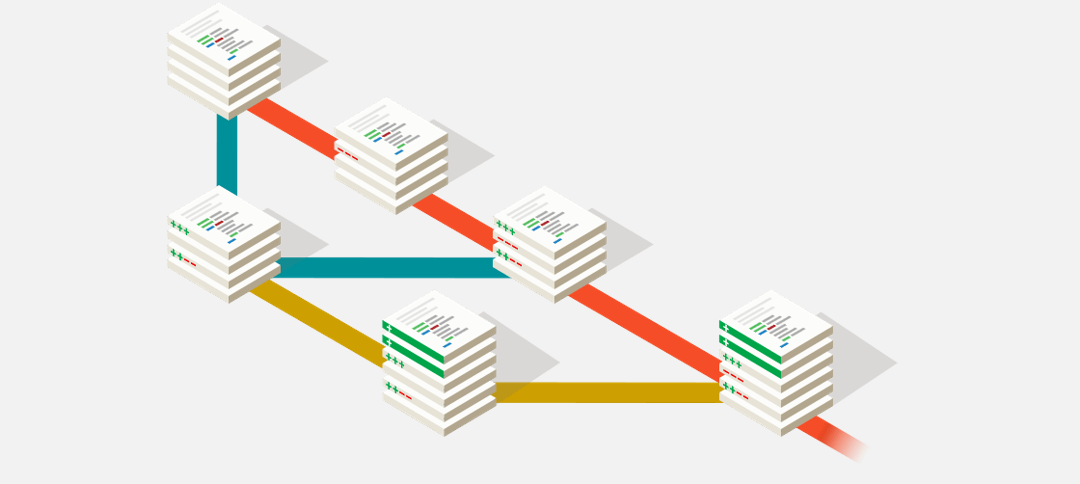
git apply mypatch.patchBranching
As a mindful developer you should strive to keep your Git history as maintanable as your code. There's a variety of techniques you can use, but be forewarned—some of them sound like heresey because they result in altered Git histories. It's common to hear colleagues call these techniques evil, but the truth is that anything can seem evil if attempting to use it without fully understanding how it works. Bear with me and you'll find they actually result in cleaner code bases and easier debugging when used properly.
The only rule you need to follow is, if you do choose to alter your Git history, either make sure it only affects a local set of unpushed commits, or wait until you're about to merge and your branch will be deleted right after the merge. Unless you know what you're doing, do not ever use
git push --force # Don't use this unless you really know what you're doingto push your changes to the remote when collaborating. This will overwrite commits on the remote branch and could unintentionally destroy someone else's work, so be extremely careful.
Amend
Say you've just committed your code, only to realize it doesn't compile because you missed a semicolon somewhere. Should you make another commit just for the semicolon fix? Well, if you haven't pushed yet, you're in luck! Make the fix, stage the file(s), and use:
git commit --amendYou'll end up with the fix amended to your last commit. Note that the hash of that commit is no longer the same after the amend, which is why this technique only works if you haven't pushed—you're changing Git's history. Note that you can also use this technique to just edit the last commit's message.
What happens if you have fast fingers and accidentally amended a
commit instead of creating a new one? Fortunately, Git has your
back. The old commit is still in Git's reflog, which keeps a
history of where your HEAD was recently. View the
reflog with:
git reflog
HEAD should currently be pointing to your amended
commit, but HEAD@{1} should be pointing to your
pre-amend commit, which still exists but is not part of any
branch. To undo the amend, you need to reset back to
HEAD@{1}, i.e. the commit HEAD was
pointing to before now. You don't want to lose the amended
changes, so we'll use a soft reset. Finally, we commit the reset
files, but only with the details of that HEAD@{1}
commit. This should restore you back to your pre-amend state:
git reset --soft HEAD@{1}
git commit -C HEAD@{1}
Moving Commits
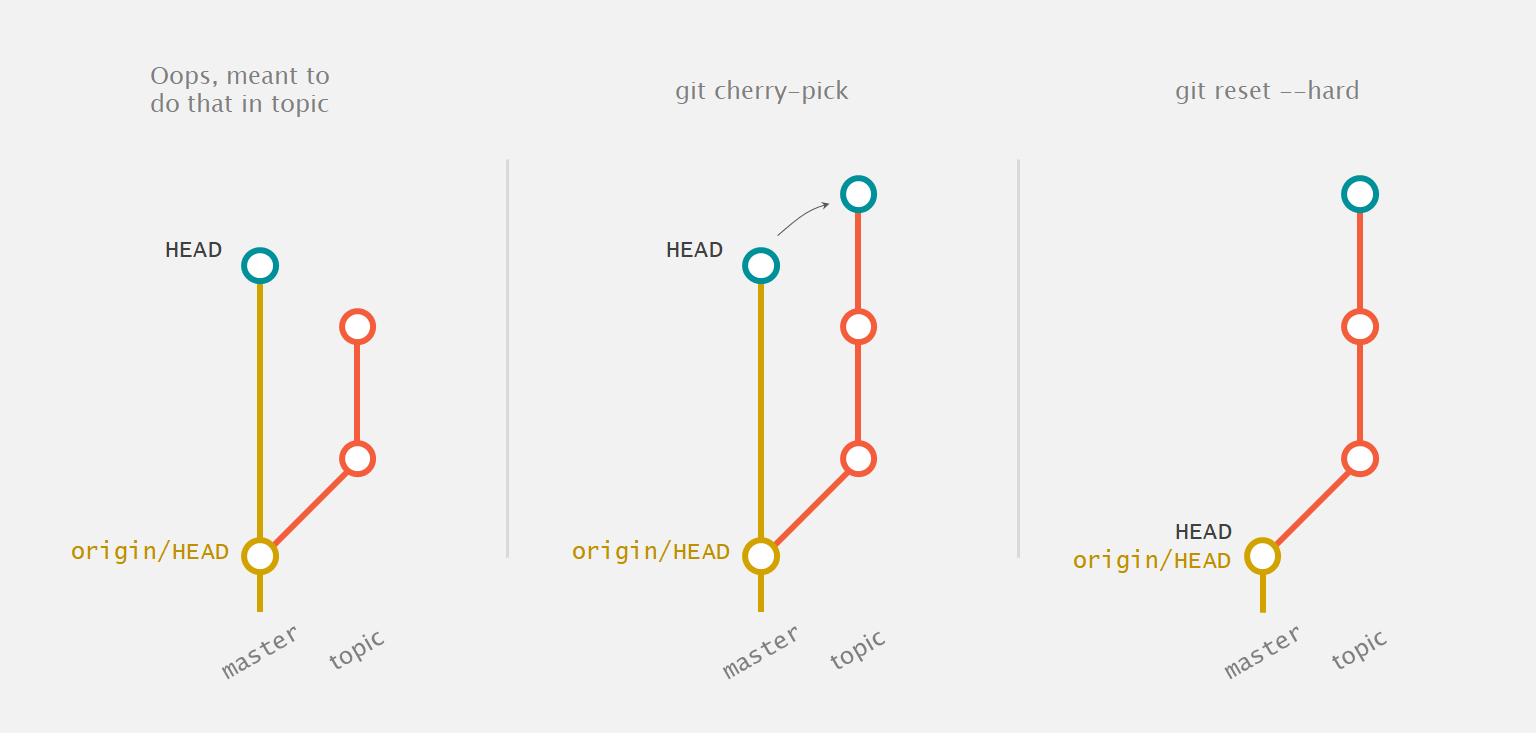
Has it ever happened to you that you've committed to the wrong
branch? It's okay, it happens to the best of us! Just don't
git push yet. Run:
git checkout topic
git cherry-pick <commit-hash>
to copy over the accidental commit to this branch. Now run
git checkout master
git reset --hard HEAD~
Now you can checkout your topic branch and push as
normal. Phew, no problem. Cherry-pick can help you out of tight
spots, but be aware that it's very easy to abuse and get you
into even more trouble.
Git cherry-pick can help you out of tight spots.
Git cherry-pick can help you out of tight spots.
For context, git reset --hard will delete commits
locally—you'd have to git pull to get them
back from the remote. Using git reset --soft, on
the other hand, will undo the commit but leave the changes from
that commit staged.
Rebase
Finally, one of the most powerful tools in Git is called rebase. It has two main uses—rebasing on top of another branch and interactive rebase. Both involve changing history, so should be not be used after you've pushed.
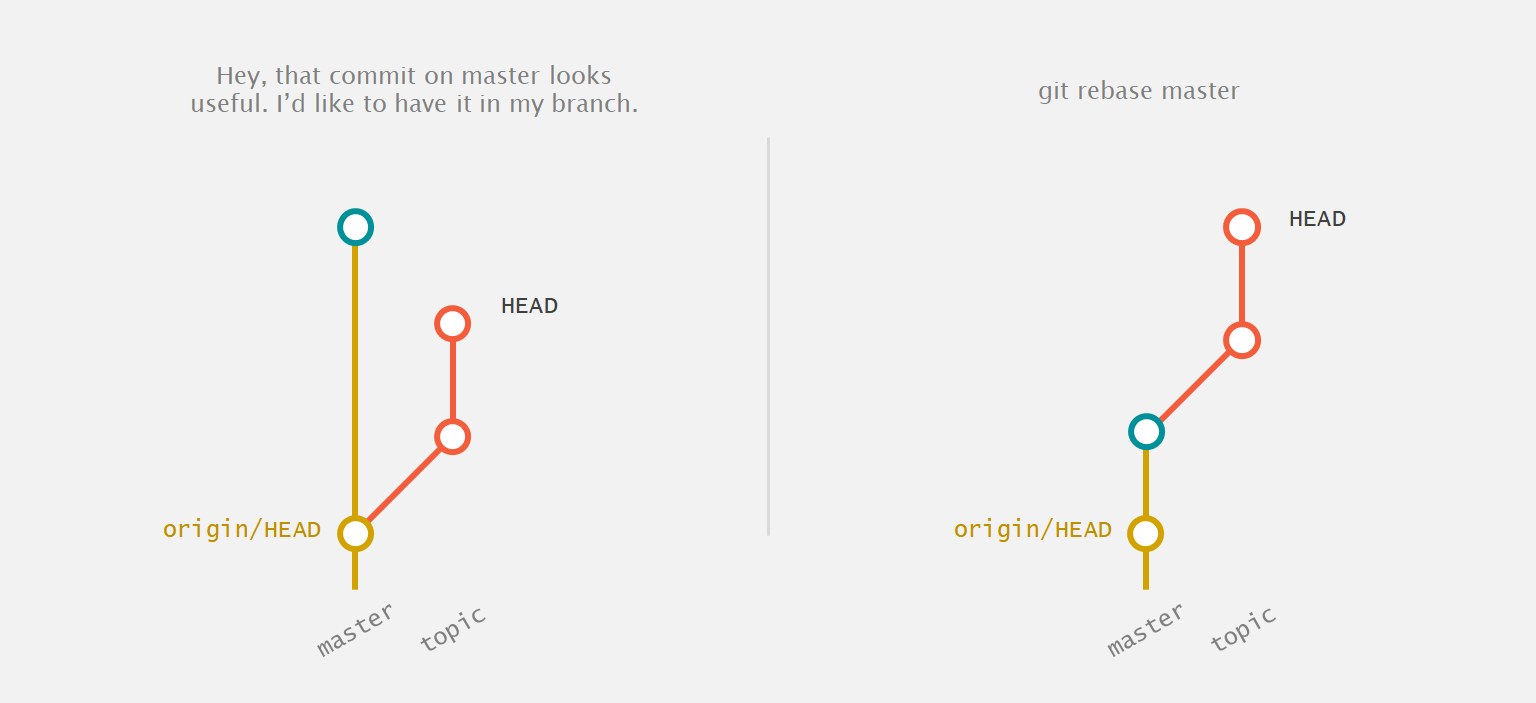
Say you've been working locally on an unpushed branch called topic, which initially branched from master. You see some new commits appear on master that you'd like to have in your branch. At this point, you have two options—conventional wisdom would have you merge master into your branch, but this tends to make your commit history a tangled mess of back-and-forth merges. Instead, you can rebase if you haven't yet pushed. Once you've fetched the new commits on master, simply run
git rebase master
and voila! Your commits have now moved on top of the latest
master. If you encounter a conflict, don't fret; just resolve it
like you would for a merge, then run git rebase
--continue (Git will prompt you). Now your branch history
will stay clean, you'll be able to trace commit history easily
across the project, and you'll be guaranteed to have a clean
fast-forward when you merge back into master. As an added
benefit, the commits related to your feature will stay together
as a group instead of interspersed with many others in master.
Git rebase can be used instead of merge.
Git rebase can be used instead of merge.
As an aside, if you're working on a pushed branch but have some
unpushed commits, you can pull your teammates' changes to that
branch with git pull --rebase to rebase your
commits on top of theirs.
Interactive rebase, on the other hand, is a great feature that comes with great power/responsibility. Imagine you're working again on a branch called topic. You've been diligently marking commits with WIP to signify that they don't necessarily build, and you're getting ready to merge back to master soon. At this point, you might want to combine multiple WIP commits into one that actually builds correctly. This is called squashing; it's a feature within Git's interactive rebase. If all your commits are unpushed, you can clean up your commits as you go without messing up anyone's history. Run:
git rebase -i HEAD~#
replacing # with the number of commits you want
to rearrange. You'll enter the interactive rebase interface.
You'll see instructions there for squashing, rewording, editing,
etc commits. You can also rearrange and delete commits in this
interface, but be careful not to lose any work. And that's it!
You've changed Git history. If you do change history after it's
been pushed, you can use
git push --force, but be extremely careful because
you risk undoing someone else's work.
Conclusion
I hope that these techniques, life-changing or not, will help
make you a better developer. For a more thorough guide, I'd
recommend checking out Pro Git. I believe a
great developer should maintain their source tree just as
fastidiously as their code. Not only does a clean history help
out your teammates, but it also helps you when bug-hunting
(enter git bisect, a topic for another post). Try
out the commands in a test project to get used to them and
you'll reap the rewards. Now git outta here!